


 Add task
Step by Step Instructions
Purpose: Complete star shot data analysis to determine isocenter offset and beam angles.
|
Protocol involves one image
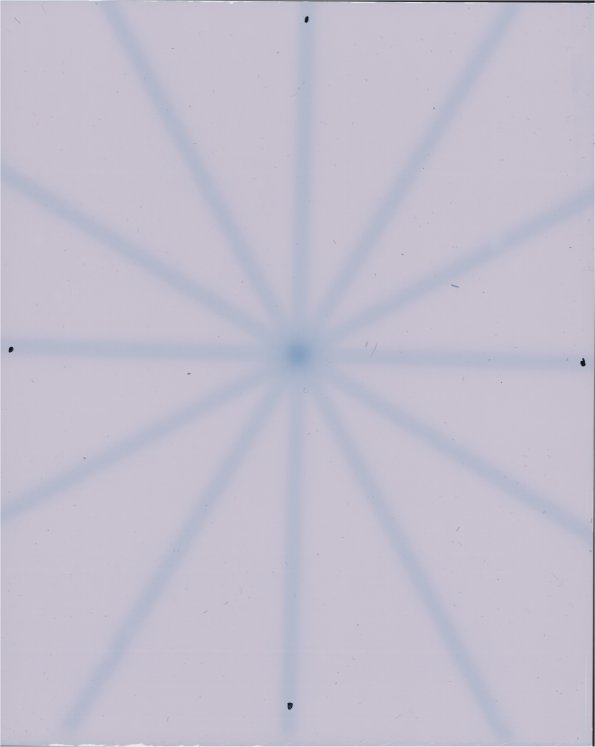
Scanned image must include
|
Data: Installation folder '.\Data\Example StarShot'.
|
1. Add Task
Add new task 'Treatment analysis' to the document.
Right click
|
|
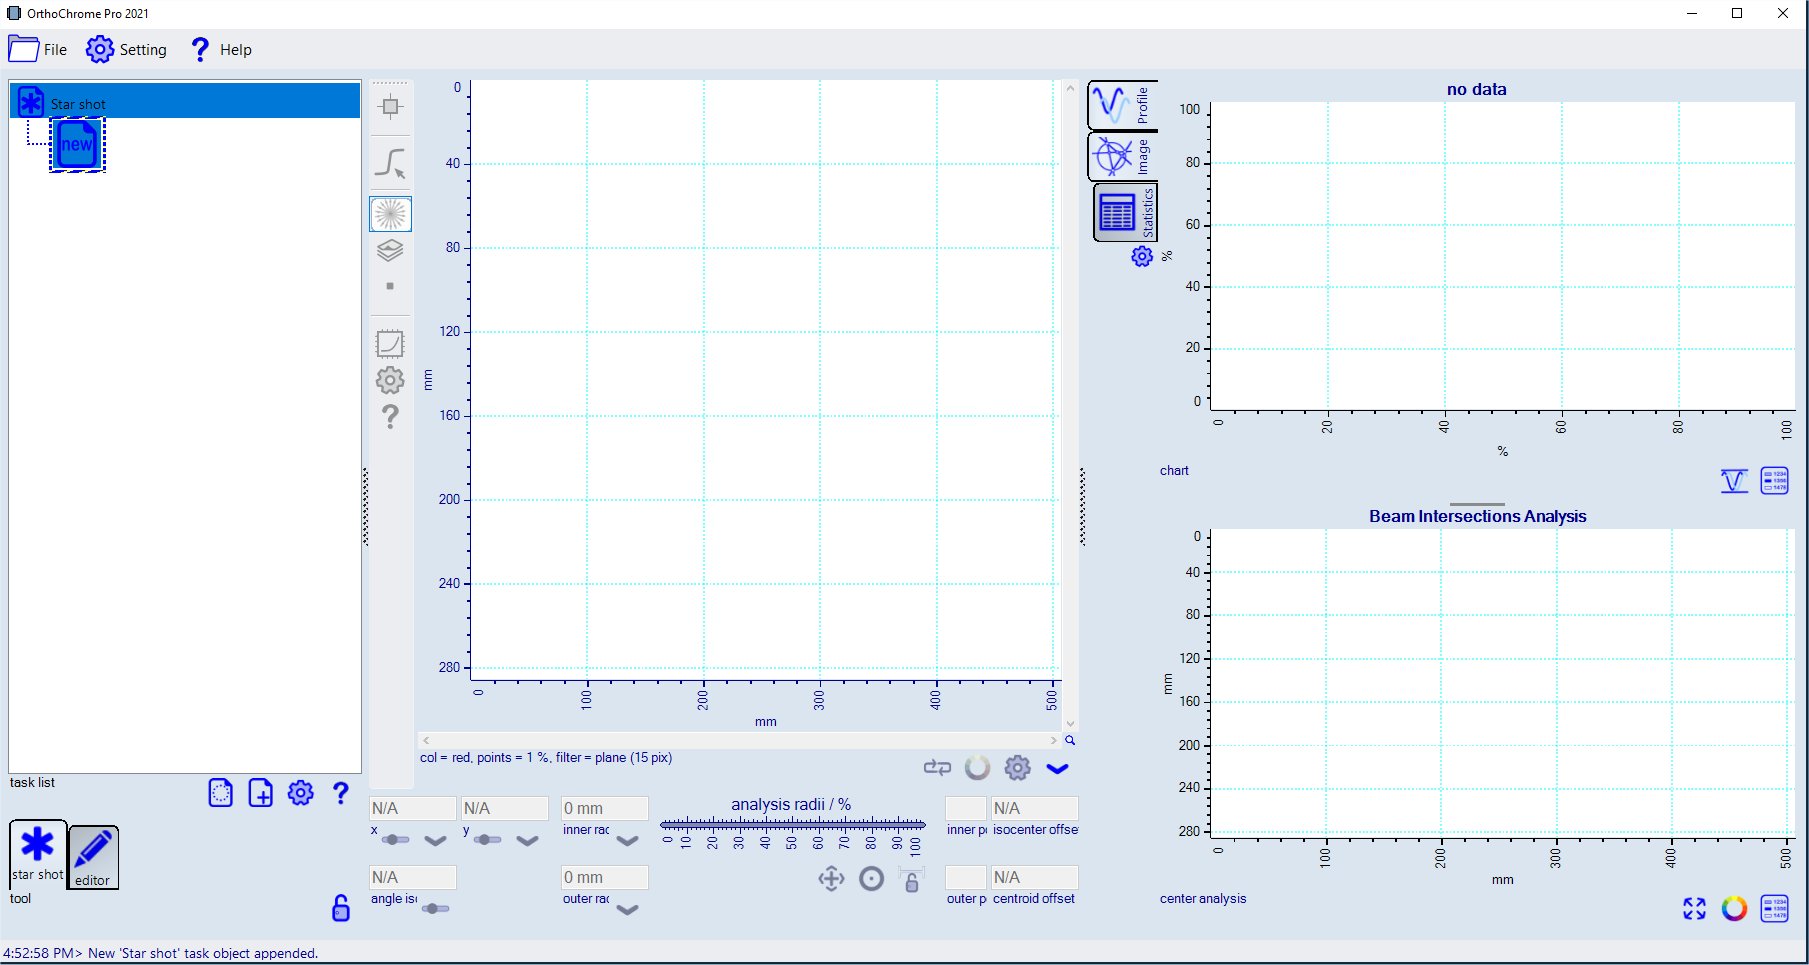
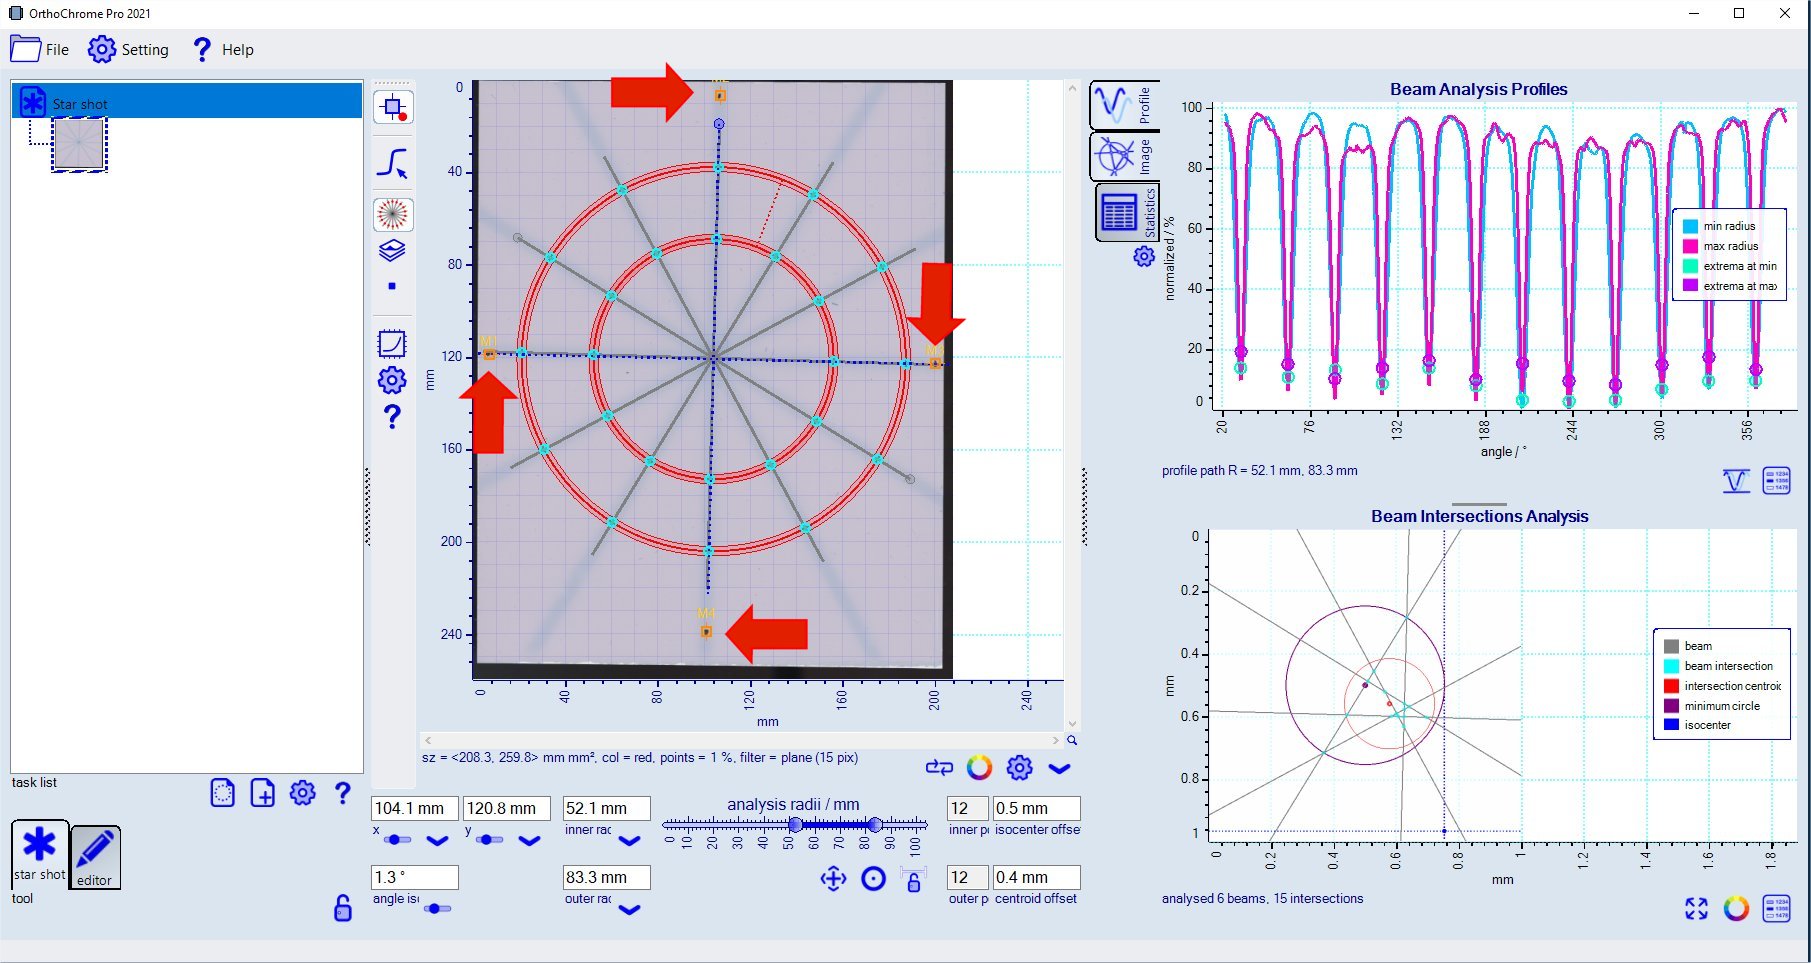
2. Assign Accelerator Information After loading the star shot scan that analysis is carried out with default settings as shown below. 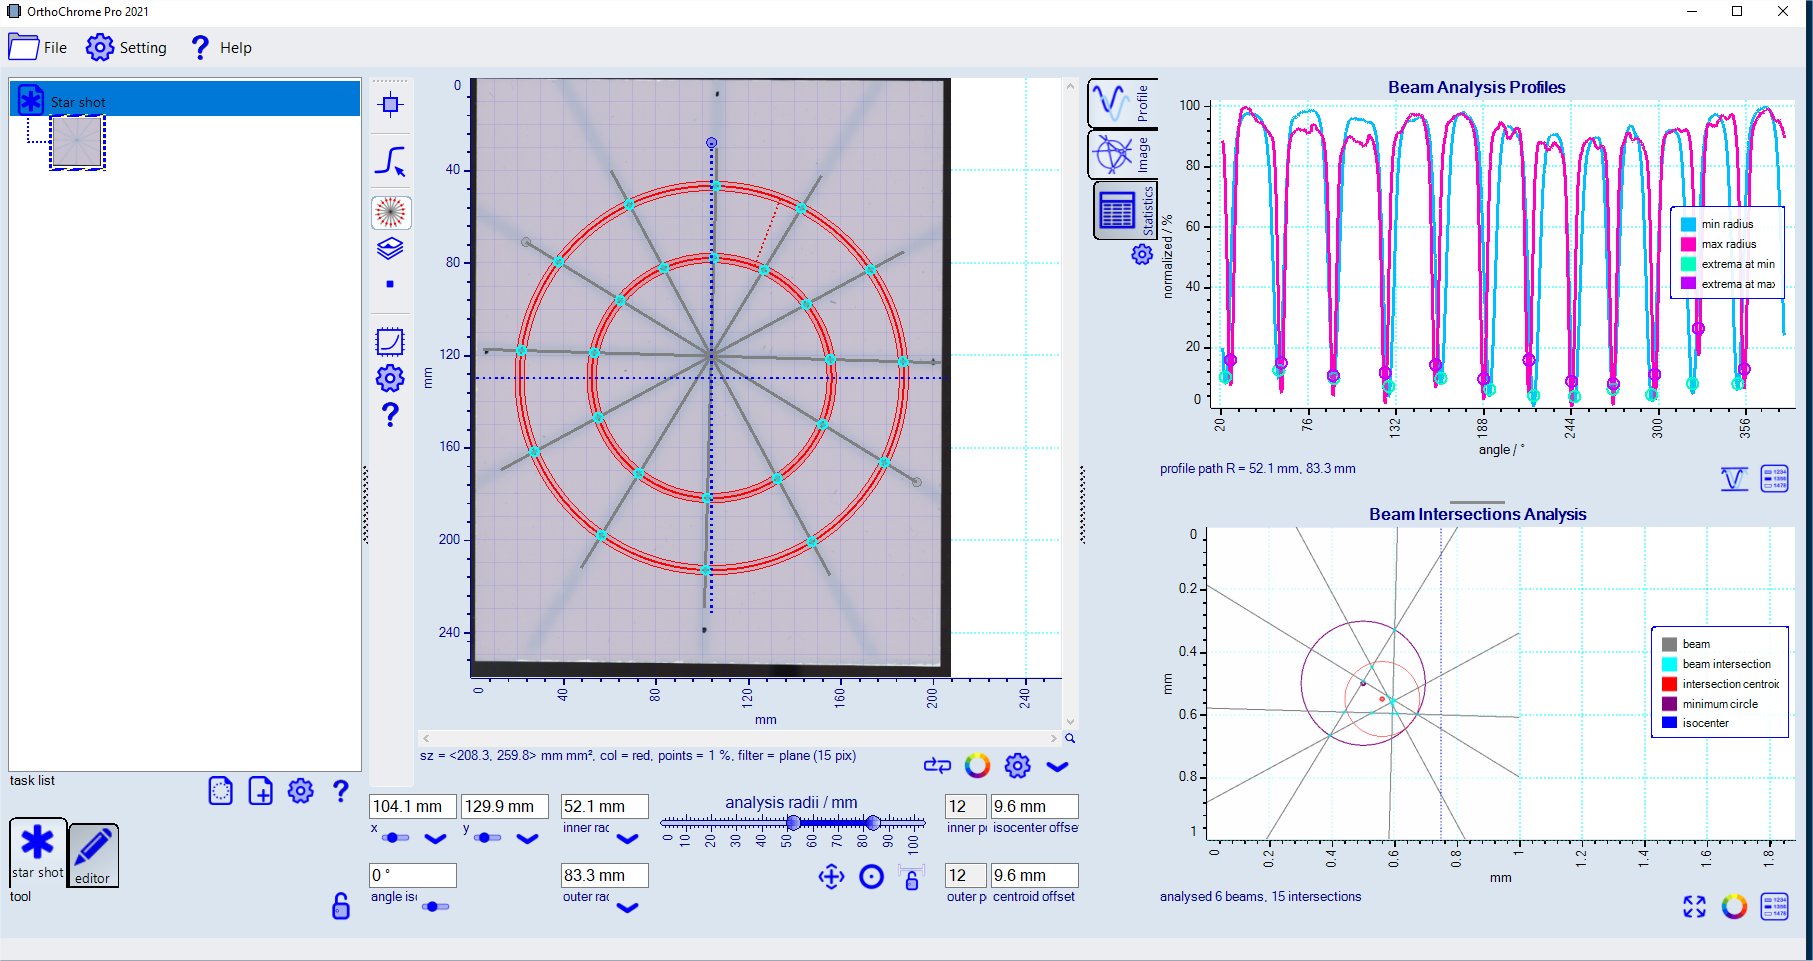
To assign the accelerator information (used in report), right click the image icon and select 'Accelerator info' and enter the data. 
|
|
3. Isocenter registration
Select fiducial tool
When assigning the third and fourth fiducial the isocenter position updates automatically and the analysis results are updated. The isocenter positon is displayed at the left underneath the chart (x, y coordinates and rotation angle) which can also be entered directly. |
|
4. Analysis Parameters
Star shot analysis is based on finding the beam intersection points with two circular paths presented by the extrema of the profile functions.
Most influencial is the selection of the radii of the analysis circles and the filtering range to smooth the the profile data.
The radii of the inner and outer analysis circle can be changed using the slider control underneath the central star shot imgage.
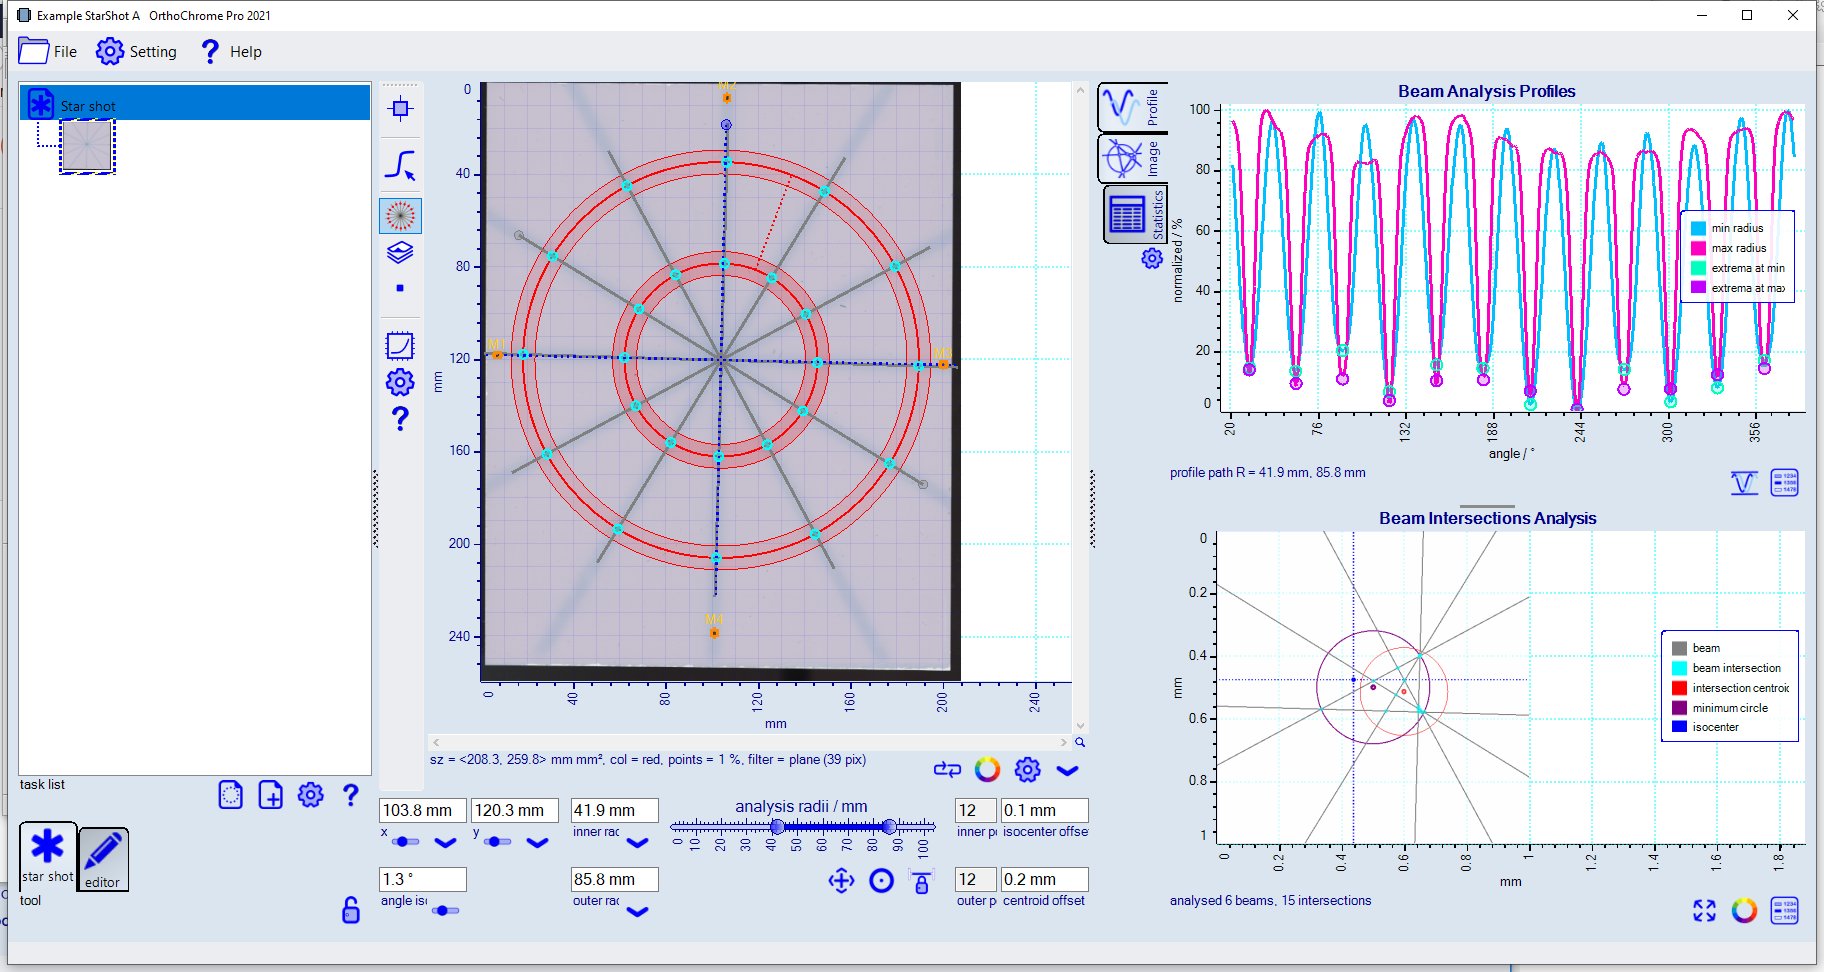
The analysis results may varry over a certain error range when modifying analusis paths and filter range.
The example below shows such varitions for wider filter range (use
Note: Assure that the starting angle for the profiles along the analysis circles differs from the beam angles.
Use the
|
|
5. Physics QA Report
Toggle from star shot analysis mode
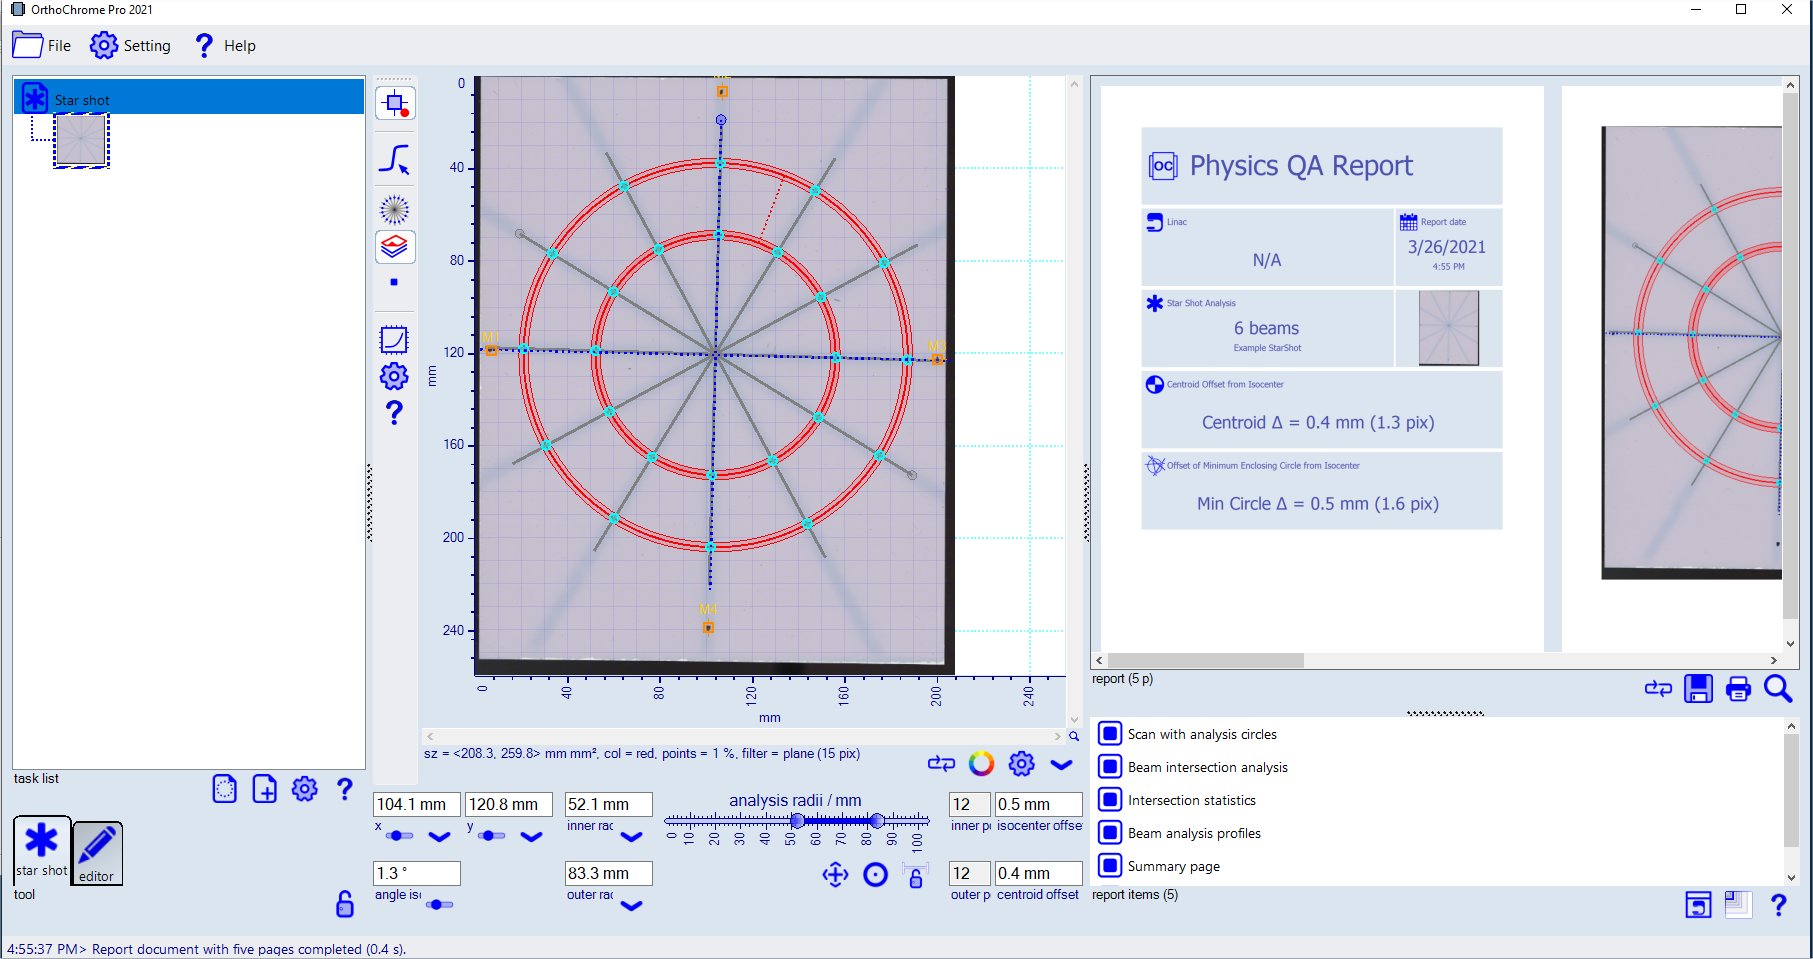
When changing any parameters of the star shot analysis (center image section), the report will update accordingly. |
 icon and load bitmap 'Example StarShot.tif' located at 'Example StarShot' folder.
 button to change) and modified radii.
-- end of document --